Homemade Caramel Corn Recipe: Crunchy, Never Chewy
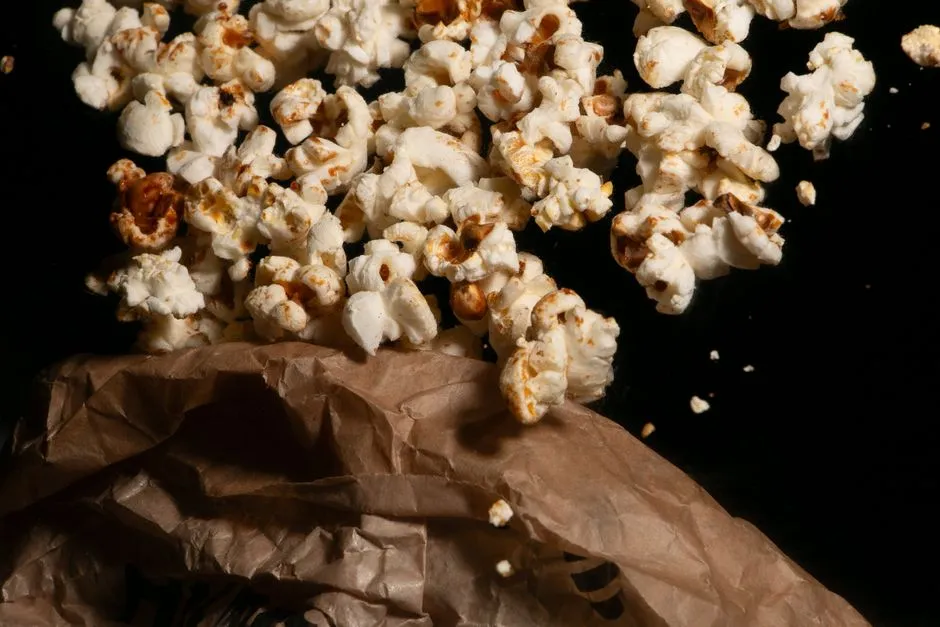
- Homemade Caramel Corn That Bakes Up Crunchy
- Ingredients for 12 Cups
- Why Corn Syrup and Baking Soda Matter
- Equipment and Pan Size
- Time Plan
- How to Make Caramel Corn Step by Step
- Why Caramel Corn Turns Chewy, Grainy, or Bitter
- Can You Halve or Double the Recipe?
- Old-Fashioned Caramel Corn vs Kettle Corn
- Variations That Keep the Base Ratio Intact
- How Long Does Homemade Caramel Corn Keep?
- Is Caramel Corn Safe for Young Children?
Homemade Caramel Corn That Bakes Up Crunchy
Homemade caramel corn is popped corn coated with a brown sugar-butter syrup, then baked at 250°F (about 120°C) for 45 to 60 minutes, with a stir every 15 minutes. The oven stage matters: it spreads the coating and removes moisture so the cooled caramel becomes crisp rather than sticky. The stovetop syrup boils for 4 to 5 minutes before baking soda and vanilla go in off the heat.
This recipe coats 12 measured cups of popped popcorn. It takes about 1 hour 30 minutes to 1 hour 55 minutes from setup through cooling, with roughly 25 to 30 minutes of active work. The batch is ready only after a cooled test piece snaps; hot caramel corn remains soft enough to give a misleading result.
The core method is not unusual. Karo's classic caramel corn also uses a five-minute undisturbed boil, baking soda off the heat, a 250°F oven, and a 45-minute bake. This version uses a slightly thicker coating and allows another 15 minutes in the oven when the cooled-piece test still bends.
Ingredients for 12 Cups
Measure the popcorn after popping. The Popcorn Board's conversion guide says 1/2 cup of kernels yields about 4 quarts, or 16 cups, of popcorn. On that basis, 1/3 cup yields roughly 10 2/3 cups. Kernel variety and unpopped kernels change the actual result, so pop 1/3 to 1/2 cup, measure 12 cups, and save any surplus for another use.
| Ingredient | Amount | Function |
|---|---|---|
| Plain popped popcorn | 12 cups, measured after popping | The base; remove every unpopped kernel before coating |
| Unsalted butter | 1/2 cup (1 stick / 113 g) | Adds flavor and fat to the syrup |
| Packed light or dark brown sugar | 1 cup (about 215 g) | Supplies the main sugar and molasses flavor |
| Light corn syrup | 1/4 cup (60 ml) | Helps limit large sugar crystals and keeps the coating smooth |
| Fine salt | 1/2 teaspoon | Balances the sweetness |
| Baking soda | 1/2 teaspoon | Makes the hot syrup foam, creating a lighter coating |
| Vanilla extract | 1 teaspoon | Adds flavor after the syrup leaves the heat |
Use plain air-popped popcorn or lightly oiled stovetop popcorn. Heavily buttered, flavored, or salted bagged popcorn makes the coating ratio unpredictable. If you need the base method, our stovetop popcorn guide covers the pot, oil, and stopping cue.
Pick out every unpopped kernel. Once covered in caramel, a hard kernel is difficult to see and can damage a tooth.
For serving math, 12 cups divides into four 3-cup snack portions or six 2-cup portions. It can also be two very large portions, but the measured recipe yield stays 12 cups regardless of appetite.
Why Corn Syrup and Baking Soda Matter
Corn syrup is not included merely for sweetness. Candy syrup can become grainy when sucrose molecules form large crystals as it cools. The Exploratorium's candy-science guide explains that glucose from corn syrup gets in the way of sucrose crystal formation. Butter also interferes with crystallization. That is why this recipe keeps both ingredients and stops stirring after the syrup reaches a full boil.
Baking soda makes the hot mixture foam. That foam introduces tiny bubbles, so the syrup spreads in a thinner layer over the popcorn. The finished coating is lighter to bite than the same amount of syrup set as one dense layer. The earlier claim that the soda necessarily reacts with both acidic brown sugar and corn syrup was too specific; the useful, observable instruction is the foaming itself.
Do not omit the corn syrup or substitute honey or golden syrup casually. Those sweeteners differ in flavor and moisture behavior, and this recipe's boil and bake were not calculated for them. If avoiding corn syrup is essential, use a recipe developed around the replacement rather than changing one component here.
Equipment and Pan Size
- A medium, heavy-bottomed saucepan with enough headroom for foaming
- A heatproof silicone spatula or long-handled spoon
- A large heatproof mixing bowl
- One 18-by-13-inch rimmed half-sheet pan, or two 13-by-9-inch rimmed pans
- Parchment paper
- Oven mitts that are dry and intact
- An optional clip-on candy thermometer that does not touch the pan bottom
The pan areas explain the substitution: one 18-by-13-inch pan has 234 square inches of surface, and two 13-by-9-inch pans have the same 234 square inches. The practical goal is a shallow, loose layer that can be stirred without trapping steam.
Time Plan
| Stage | Time |
|---|---|
| Popcorn, pan, and ingredient setup | 10 minutes |
| Melting, boiling, foaming, and coating | About 15 minutes |
| Bake at 250°F, stirring every 15 minutes | 45 to 60 minutes |
| Cool completely on the pan | 20 to 30 minutes |
| Total | 1 hr 30 min to 1 hr 55 min |
Cooling is part of the method. The coating hardens as its temperature falls, so a warm piece cannot establish whether the batch needs more oven time.
How to Make Caramel Corn Step by Step
Step 1: Prepare everything before heating sugar
Heat the oven to 250°F (about 120°C). Line the pan with parchment. Put 12 cups of plain popped popcorn in the largest heatproof bowl you have, leaving enough room to fold from the bottom.
Measure the vanilla and baking soda into separate small dishes beside the stove. Clear the route from saucepan to bowl and from bowl to pan. Keep children and pets outside the cooking area. Hot sugar syrup adheres to skin and can cause a serious burn; do not touch or taste it, and do not carry the saucepan through a crowded room.
Step 2: Bring the syrup to a full boil
Melt 1/2 cup butter in the saucepan over medium heat. Add 1 cup packed brown sugar, 1/4 cup light corn syrup, and 1/2 teaspoon fine salt. Stir while the mixture heats so the sugar dissolves evenly.
When bubbles break across the full surface, begin timing. Stop stirring and boil for 4 to 5 minutes. The exact time needed to reach a full boil varies with the pan and stove; the timed interval begins at the full boil, not when the first bubbles appear.
Stirring after that point can move sugar crystals from the pan wall into the syrup and encourage a grainy result. Leave the pan in place and watch it continuously.
Step 3: Use a thermometer correctly if you want one
A thermometer is optional because the recipe has a defined five-minute boil and a long oven finish. If you use one as a cross-check, aim for the firm-ball region at sea level rather than the old 245-250°F shorthand. University of Illinois Extension places firm-ball stage at 244-248°F and warns that a probe touching the pan bottom gives a falsely high reading.
Altitude changes the boiling point. Utah State University Extension recommends checking the thermometer in boiling water, finding how far that reading falls below 212°F, and subtracting the same difference from the recipe's target. For example, a thermometer that reads 203°F in boiling water is 9 degrees below the sea-level reference; a 246°F candy target becomes 237°F. This adjustment is for the thermometer target. Keep the recipe's visual cues and oven test as the final check.
Step 4: Add vanilla and baking soda off the heat
Remove the saucepan from the burner. Stir in 1 teaspoon vanilla, then 1/2 teaspoon baking soda. The caramel will foam and rise. Keep your face and hands back, use a long-handled utensil, and do not lean over the pan.
Mix only until the foam is even. Move directly to coating the popcorn; the syrup thickens as it cools.
Step 5: Coat the popcorn and spread it out
Pour the caramel over the popcorn in a broad spiral rather than one pool. Fold from the bottom with the heatproof spatula until most pieces carry some coating. Do not handle the popcorn with your hands.
Spread it across the prepared pan. A few pale spots are fine because the coating redistributes during the oven stirs. If the popcorn forms a deep mound, divide it between two pans.
Step 6: Bake and stir every 15 minutes
Bake at 250°F for 45 minutes, stirring at 15, 30, and 45 minutes. Turn the coating over rather than merely moving the top layer around. Keep the pan level and use dry oven mitts.
At 45 minutes, transfer one piece to a cool plate with the spatula. Leave it for 2 minutes without touching it. Once cool enough to handle safely, test it. If the coating snaps, remove the pan. If it bends or remains chewy, bake for another 10 to 15 minutes, then repeat the cooled-piece test. Do not exceed the cue merely to satisfy the clock; ovens vary.
Step 7: Cool before breaking into clusters
Set the pan on a heatproof surface and let the caramel corn cool for 20 to 30 minutes. Do not break it apart by hand while the coating is warm. Once fully cool and hard, separate the clusters and move them to an airtight container.
Why Caramel Corn Turns Chewy, Grainy, or Bitter
| Problem | Likely cause | Next-batch correction |
|---|---|---|
| Chewy or sticky all over | The oven stage ended before enough moisture left the coating | Bake 45-60 minutes and use a fully cooled test piece |
| Chewy in patches | The caramel pooled or the popcorn was not turned during baking | Pour in a spiral and stir at every 15-minute mark |
| Soft sections under a crisp top | The popcorn sat in a deep layer that trapped moisture | Use one half-sheet or two 13-by-9-inch pans |
| Grainy or sandy coating | Sugar crystallized during the boil | Stop stirring at a full boil and keep the corn syrup in the formula |
| Dense, thick shell | The baking soda was omitted or not distributed through the syrup | Measure 1/2 teaspoon in advance and stir it in evenly off the heat |
| Bitter or very dark edges | The oven ran hot, or the batch stayed in after a cooled piece was crisp | Verify oven temperature and stop at the cooled-piece cue |
| Crisp when cool, sticky later | The container was left open or the room was humid | Cool completely, then seal promptly in an airtight container |
Humidity matters because sugars attract water. It does not mean a fresh batch failed, but it shortens the open-air crisp window. Keep the lid on between servings.
Can You Halve or Double the Recipe?
A half batch is straightforward because every quantity divides cleanly:
| Ingredient | Half batch | Standard batch |
|---|---|---|
| Popped popcorn | 6 cups | 12 cups |
| Butter | 1/4 cup (57 g) | 1/2 cup (113 g) |
| Brown sugar | 1/2 cup (about 108 g) | 1 cup (about 215 g) |
| Corn syrup | 2 tablespoons (30 ml) | 1/4 cup (60 ml) |
| Salt | 1/4 teaspoon | 1/2 teaspoon |
| Baking soda | 1/4 teaspoon | 1/2 teaspoon |
| Vanilla | 1/2 teaspoon | 1 teaspoon |
Use one 13-by-9-inch rimmed pan for the half batch. Begin the cooled-piece test at 45 minutes; do not automatically halve the baking time, because coating thickness and oven behavior have not halved.
For 24 cups of popcorn, use two 18-by-13-inch half-sheet pans. Make two standard caramel batches one after the other instead of doubling hot syrup in one medium saucepan: a larger foaming sugar batch needs more pan headroom and can alter the time needed to reach the same stage. Swap the pans' oven positions at each 15-minute stir and expect the bake to run toward 60 minutes.
Old-Fashioned Caramel Corn vs Kettle Corn
Caramel corn is popped first, coated with cooked caramel, and baked. Its coating is thicker and fully crisp after cooling. Kettle corn cooks sugar with the kernels in the popping pot, producing a thinner sweet-salty glaze without the long oven stage.
If you want the lighter in-pot version, our kettle corn recipe explains the shaking rhythm and scorching cues.
Variations That Keep the Base Ratio Intact
- Salted caramel: add flaky salt after the last oven stir, while the surface is still tacky.
- Caramel nut corn: add 1 cup roasted peanuts, pecans, or cashews to the popcorn before coating. For gifts, label the nut and dairy allergens clearly.
- Spiced caramel: add 1/2 teaspoon cinnamon or a small pinch of cayenne with the fine salt.
- Chocolate drizzle: let the caramel corn cool completely, drizzle with melted chocolate, and leave it undisturbed until set.
Do not add liquid flavorings beyond the measured vanilla without recalculating the recipe; extra water works against the crisp coating.
For serving combinations, the movie-night snack guide pairs this make-ahead sweet with salty and fresh options.
How Long Does Homemade Caramel Corn Keep?
Store fully cooled caramel corn in a tightly covered container at room temperature. Land O'Lakes' caramel-corn recipe gives a storage window of up to 2 weeks in a tight-fitting container. Use 1 to 2 weeks as a quality range, not a safety guarantee: humidity, added nuts or chocolate, and repeated opening all affect texture.
Do not refrigerate plain caramel corn. Cold storage can introduce moisture and soften the sugar coating. For gifting, fill tightly closing bags or containers only after the batch is completely cool, and label milk and any nut ingredients.
Is Caramel Corn Safe for Young Children?
No for toddlers. The American Academy of Pediatrics' current choking-prevention guidance lists popcorn and hard, gooey, or sticky candy among high-risk foods to keep from children until age 4 or older, depending on the child's development and maturity. Caramel corn combines both textures. Cutting or crushing it does not turn it into a toddler-safe food.
Serve it only to children developmentally ready for popcorn, seated and supervised. Keep all children away from the stove, hot saucepan, and baking pan during preparation.